Happy Friday!
I hope everyone had a great week! We have actually had 5 days straight with no rain. Yippee!

Today I would like to share with you how you can create this beautiful flower and give you some inspiration to use on your next Inky project. Are you ready? Ok let's head into my craftroom....
Here is how we get started. You will need lace, Twinkling H20's, Silk Acrylic Glaze, matte finish, paint brushes, craft matte, spray bottle with water and water to clean your brushes. I made my own pattern for my flower (this is my star flower). First, you will need to make your pattern then cut out your petals - five sizes and five of each size.

Before we begin to paint; you should have petals like below.

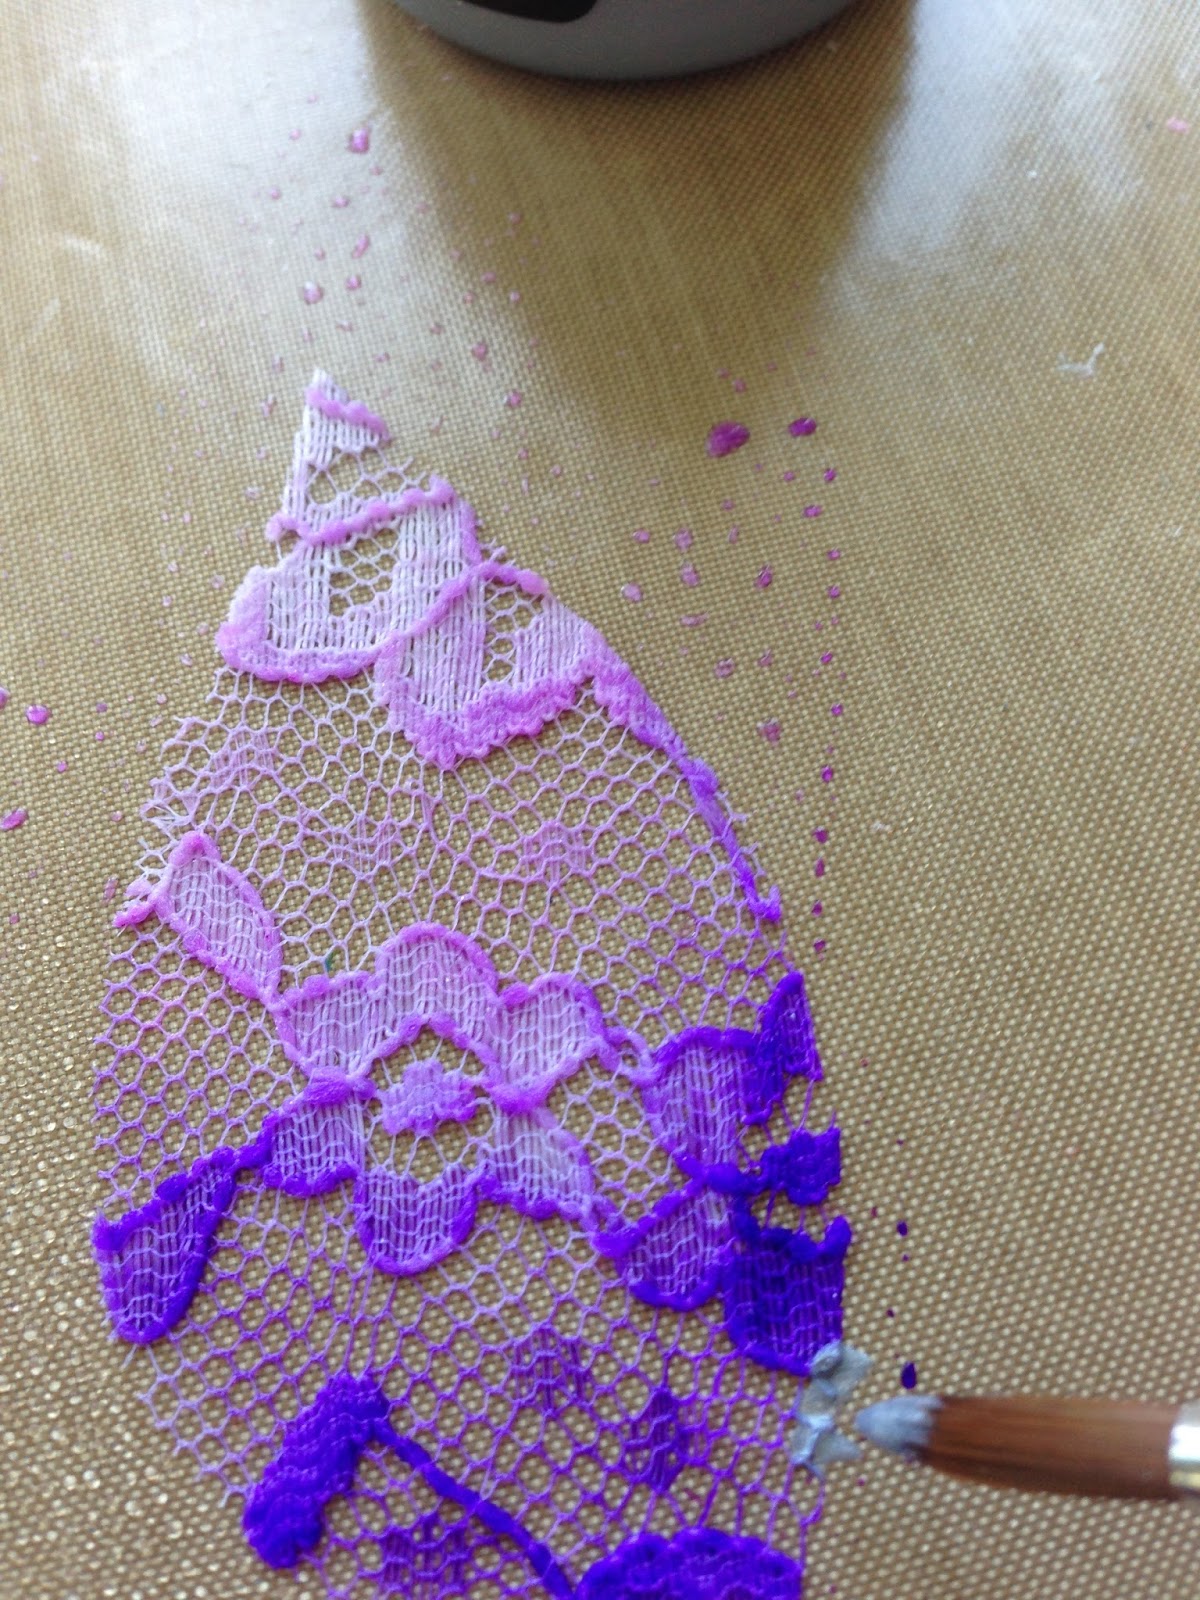
I chose two Twinkling H20's-1 light color -Plum Blossom - 1 dark color Snapdragon.

On my flower I wanted the center darker then lighter toward the edge of the flower. Your spray bottle of water is your best friend for this part of your creation. The more water the more you can blend. If you want your flower to be dark don't us as much water.

Now to highlight the outer edge of my flower I used Silks Acrylic Glaze - Silver Bells. I would have preferred a darker color in the violet family but I just started building my collection. When the color is darker it is quite dramatic.
Before the next step you want to be sure your petals are completely dry. You can dry them with a heat gun or if you have time let them dry on their own. If you are in a more humid climate you will probably want to heat dry. After your petals are dry, I used an old brush to add the matte finish to each petal. Again dry completely. (you want to be sure you have an even coat of the finish - do not leave any clumps)

Ok, now we are ready to create our flower. You will need a mini stapler and a 1" circle of a light-medium weight piece of cardboard.

Ok, now pinch the bottom of each flower and staple. Do this to all the flowers. Stapling the flowers helps to keep their shape.

Once finished with the stapling see the nice shape that appears. I attached the large size to the bottom and alternate with the next size until you have finished your flower.

Below is an example of my first row.

To complete your flower you will want to add a button or an embellishment of your choice as the center of your flower. Glue the finishing touch and you have completed your first flower.

Below are a couple of Inky Stamps that would look spectacular with this flower. You could use the flower on the card with a sentiment or you could create an altered canvas. The possibilities are endless!

I hope I have inspired you today. I will be away for a month. But join me in October as we create an altered canvas together. Thanks so much for stopping by and joining me in creating a lace flower!

This is so pretty!!! How creative!
ReplyDeleteThank you for this tutorial!! i love your lace flowers and I now I see clearly that I have been using the wrong lace and mine do not work as nicely as yours. Great tutorial Karen.
ReplyDeleteHugs Kelly
Karen, Love your pretty flower. Thanks for sharing the how too.
ReplyDeleteHugs, Pat